Here's the catch! We meet with the cabinetry guy on Monday morning to go over the plans for each room. Aaaaaagh! I know he'll have me something to "proof" later on, but I don't want to be the lady that has to have it completely redesigned because I forgot to tell him this . . . oh, and could you add that? Heh, heh, heh.
Soooooo, besides lots of shelves and drawers for paper/embellies, what little details would you incorporate if you could?
****************************************************
I bought a room planning program from BH&G to help me visualize certain rooms in our new home. Would you like to take a tour of my new Scrap Room? :)
Okay, here we go! Show-and-Tell of Jana's planned scrap space. LOL!
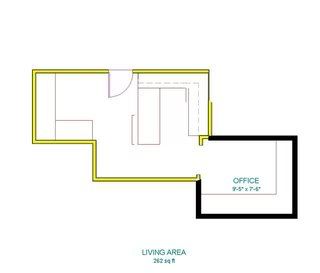
This is the overall floor plan of the space. Funky isn't it? :) The main area is 11' wide by 12' deep. The Bonus area to the right is 9' X 7.5' and steps up six inches from the Main area. The area to the left will be my Messy area for stamps and paint. It is 7' square. It was originally a walk-in closet for this odd-shaped bedroom, but I had them take the wall out to make it more open.
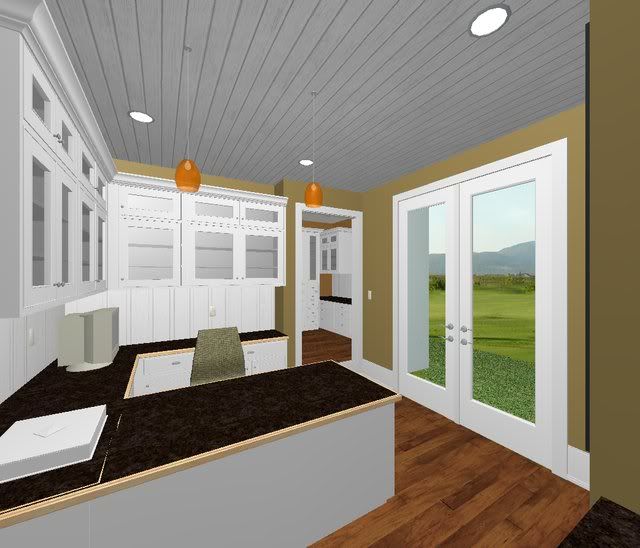
This is a view of the Main section from just inside the doorway. I couldn't figure out how to make the ceiling look pitched (it goes up about 12' into a pitched vault. I will have lots of can lights and a cute chandelier hanging from the center), so they are just flat in this photo. The cabinets are a generic graphic from the program just to give me a general idea of what the room will look like. The french doors are on the west side and go out on a little balcony (my room is on the 2nd floor) that is just for looks, maybe two feet deep. It will atleast be nice to see the kids riding their bikes from my room while I work. I decided to face my desk the way it is so I wasn't looking directly into the sun as it was going down . My computer will go on the East Wall. The flat gray box is there to represent my cutter. I think I will have the hole in the counter on the side towards the wall.
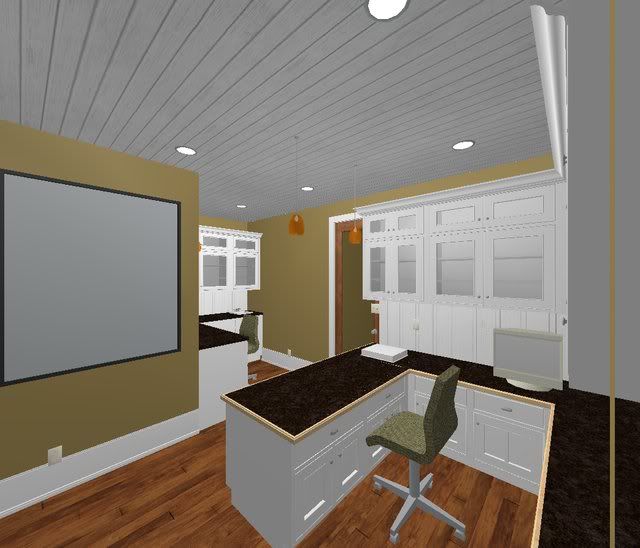
Here is the view of the main area from the bonus room doorway. The frame on the wall represents my large framed magnet board. I have one now and LOVE it! It's so great to hang things up on and stare at for awhile when I'm trying to decide if my layout is finished or not.
(ETA: I forgot to mention that wherever there are chairs (and underneath the computer area) it will be open for legroom, . . . I just couldn't figure out how to make it that way on the program.)
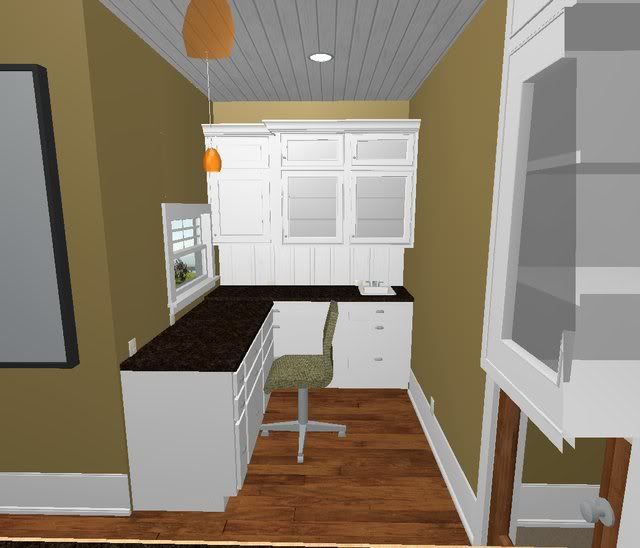
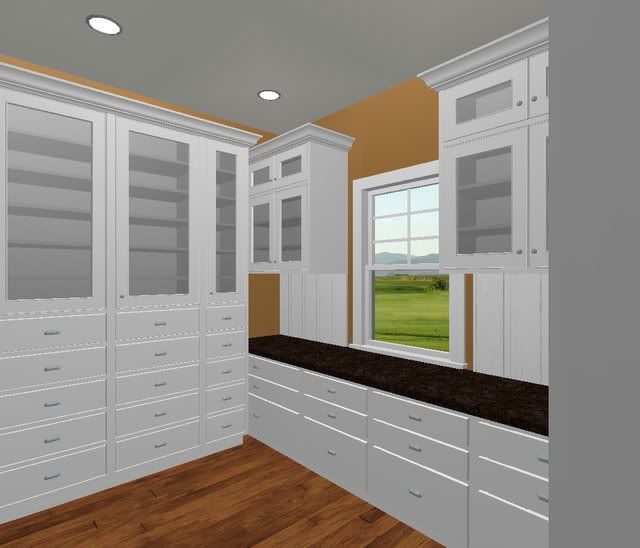
This is the view of the Messy Area from the Main desk area. I decided to keep all the cabinetry at counter height. I am going to put a stool in this area to work at. I think it will also be a popular place for my kids to congregate and do their homework while I am working on my projects. :) The window is a little off-center in this space (it's centered on the wall outside). But I think the space to the left of the window will be perfect for setting up my Clip-It-Up. :) The sink will come in handy for paint and stamps.
Okay, last one (if I haven't bored you, already :lol:). This is the view of the Bonus room. It steps up from the Main area because it is located over the front porch. I have no idea of how I'm going to do cabinets in this part. I just plopped in a few graphics to see what I thought. I definitely will do a counter under the window. I think it will be a great place to put my cuttlebug and general paper storage. Maybe put a bunch of drawers in, so I can keep my embellies organized by color in each one. ???
So there is my little tour. Any more suggestions now that you've seen it? :)


WOW Jana!! All I can say is "GulP! Those cabinets are going to be spendy!" Gorgeous though!
ReplyDeleteThe only suggestion I would have but this is just my personal thing is that I loved my island in my old house it was higher than standard so I could stand comfortably without hunching over to stamp and work on projects. I never seem to sit except when I am doing detail cutting.
you lucky girl!
ReplyDeletethe only thing I would ask is if you are a sit down scrapper -- will those storage cabinets stop you from having a comfortable sitting position? you know - will you be able to scoot in?
that's all - looks great
Oh! I forgot to add that. LOL! Wherever there are chairs the countertop will be open. I just couldn't figure out how to do it on the program. (TeeHee)
ReplyDeleteOK, I officially want to move in with you... got a spare bedroom in that house of yours? Hehe, seriously though, the space looks incredible! What about some open shelving to store pretty jars full of embellies?
ReplyDeleteI AM SOOOO MOVING IN!!!! :)
ReplyDeleteGet pull-out drawers for your cabinets...wish I had went ahead and added them.
That is going to be AWESOME! It looks HUGE. I would have said to have them build a shelf to put your printer on so that you don't lose the work space, but I don't know that you're really going to miss it with all the space you'll have :)
ReplyDeleteThe first thing i have to say is... can I come and sleep there????? LOL!
ReplyDeleteMake sure your storage cabinets are deep enough for at least one section of album storage.... at least 14 inches deep, 14 inches tall. I love the little sink area! That would be the first thing I would put in my space. What about a small section of high countertop.... enough so you don't have to bend over?
Be careful with your open cabinetry... if it's for paper storage you may have colour faded papers quite quickly.
Make sure you get jacks put in for your computer and phone lines. And extra electrical outlets o9n the counter top areas for toys and other plug in appliances.
I'd have as much of your storage areas closed. Less cost and you can put anything behind a closed door with no glass!
Good luck Jana! I wish I come and see the finished project some day!!! AWESOME! So green with envy girl!!!
Wow, this looks amazing! I think it'd be the perfect space. :)
ReplyDeletelooks fantastic to me! Only thing I can think of is where's the mini fridge for your sodas and waters...lol!
ReplyDeleteit's perfect! :)